31.12.15

7" f/12 iStar folded refractor 3: Decisions-decisions!

*

One question which crops up often is: Should one "invest" in a more compact APO of the same aperture? Rather than "enjoying" the difficulty and expense of building [or buying commercially] a folded, long focus refractor? Only a very long focus achromat can possibly compete on colour correction with an Apo. If taken to its natural limits would result in an extraordinarily long focal length. F/20 and well beyond is demanded by Conrady's far stricter CA limits of a CA-ratio >5. [CA ratio = Focal Ratio /aperture in inches.] f/30 / 6" = 5 falls just within his stringent criteria. Whereas Sidgwick suggests that f/18 / 6" = 3 is an acceptable level of colour correction for this popular size of refractor. It seems odd that most 6" classical style refractors are f/15 with an f/12 option. Those who, like me, own an f/8 must just try to ignore all the "pretty colours."  

The usual effect of relaxing CA-ratios is a purple fringe around bright objects where blue and red are not focused in the same plane. Tolerance of violet fringing is remarkably variable between telescope users and can be seeing-dependent. Older observers tend to have some yellowing of their own eye lenses which can act as filters to some extent. Yellow No8 filters are still a popular way of reducing CA even after the arrival of multi-layer filters like the Fringe Killer. Though it should always be remembered that filters work by removing unwanted light. While Apos add that light to their images by bending more colours to a common focus. The image seen through an apochromat telescope is usually more cosmetically attractive than through an achromat. The apochromat should have a brighter image too which may offer greater "reach" into low-brightness subjects and limiting magnitudes.  

You can't have your short focus refractor cake and eat it when it comes to chromatic aberration. The builder or buyer must ask whether the cost of the precision optical flats can be "written off" against the [sometimes considerable] savings from using a much smaller mounting when a suitably long focus lens is folded optically. Not to mention savings from a smaller housing for either instrument compared with the long, straight achromatic refractor. The APO may claim to be free of false colour, in comparison with an achromat, but has other drawbacks or limitations. Some of which are still so serious as to preclude mass adoption.[Price being the major drawback!]

The cost of larger APOs rises almost exponentially above six inches aperture. Which makes them very poor value compared with a simpler, achromatic refractor. [Or a simple Newtonian reflector which is completely free of false colour!] There are relatively few commercial apochromats over about 180mm/7" aperture. So economies of scale in mass production never arise. The glass remains difficult and expensive to obtain because there is literally almost no demand for large melts from which to extract suitably large blanks. Then there is the matter of fragility of some exotic glasses. Some can suffer from breakage due to thermal shock and others are slightly water absorbent. Absolute longevity in use might be an issue with some types of glass. We tend to think of refractors as lasting for centuries.

Apos [apochromats] often have cooling issues in triplet form due to the large mass of glass involved. The center element is not even exposed to the air on either side so is effectively insulated by the outer lens elements. "Oiling" may help to increase conduction but does not reduce the overall mass. The sheer weight and nose-heaviness of a triplet APO is another disadvantage. The moment arm will usually demand a sturdy [expensive] mounting. Steep curvature might be necessary for short focus lenses resulting in extra thick lens elements compared with the more "humble" achromat.

Meanwhile, the very long focus achromat [for inherently low false colour] will have a much smaller field of view than the short focus Apo. Though the long focus automatically provides high powers with longer focus eyepieces providing comfortable eye relief. Which might be more important to potential Apo-owning, spectacle wearers unless they can also afford exotic eyepieces which offer good eye relief. Exotic [expensive] eyepieces will be necessary with short focus Apos anyway. While long focus refractors are very forgiving and will work well with almost any eyepiece.


Folded 7" f/12 using minimum 122mm and 82mm folding optical flats. The focuser is now above the OTA body to reduce overall length and its vulnerability during carriage. The bend in the light cone at the star diagonal is also indicated. The angles at the mirrors have been widened to reduce the risk of stray light by ensuring complete baffling is possible. A roughly drawn suggestion of a possible plywood case is also shown.

Sacrificing the image quality of a fine achromatic lens with inferior optical flats is really not sensible. It might seem like an easy short cut to Apo-like correction. But it is very risky just to obtain the mechanical mounting and smaller housing advantages of an APO of similar aperture. The Apo might be more useful on Deep Sky observations while the very long focus achromat is better suited to the visual study of Solar System objects. An Apo will usually require considerable amplification of the image size [using Barlow lenses] before a planet will register more than a few pixels on the camera sensor. While the long focus achromat already has magnification aplenty to provide suitable image scale.    

Poly-chromatism refers to the difference in lens accuracy/correction measured at various wavelengths of light. This is why long focal length achromats are much preferred to reduce the effects of achromatic aberration to as low a level as possible. Long focal lengths are also claimed to be far more forgiving during poor seeing conditions. Unfortunately the heavy lens and its cell mounted at the far end of a long, straight tube make the "classical" refractor inevitably unwieldy. It is very difficult to mount adequately due to the effective moment arm. Fortunately, folding the very long optical path can eliminate many of the usual mounting and housing problems by considerably reducing the moment arm and OTA length.

Moment arm = Mass x Distance from the fulcrum. Or distance of the heavy objective, cell and counter-cell  assembly from the mounting bearings in the real world. A heavy focuser and back plate will add their own mass x distance to the overall moment arm. They may help to balance the objective but will still contribute to the moment arm ]

The folded refractor can often reduce the moment arm to [probably] 1/3rd of the straight tube form. Allowing even longer focal lengths to be more easily accommodated on rather more "humble" [i.e. cheaper] mountings. The very high cost of even secondhand AP1200 mountings can be safely avoided by folding a "long" straight refractor. It will then fit more safely on a Skywatcher class of mounting. Those who can afford an Astro-Physics mounting will still enjoy the shorter, folded refractor over the straight "long" version.

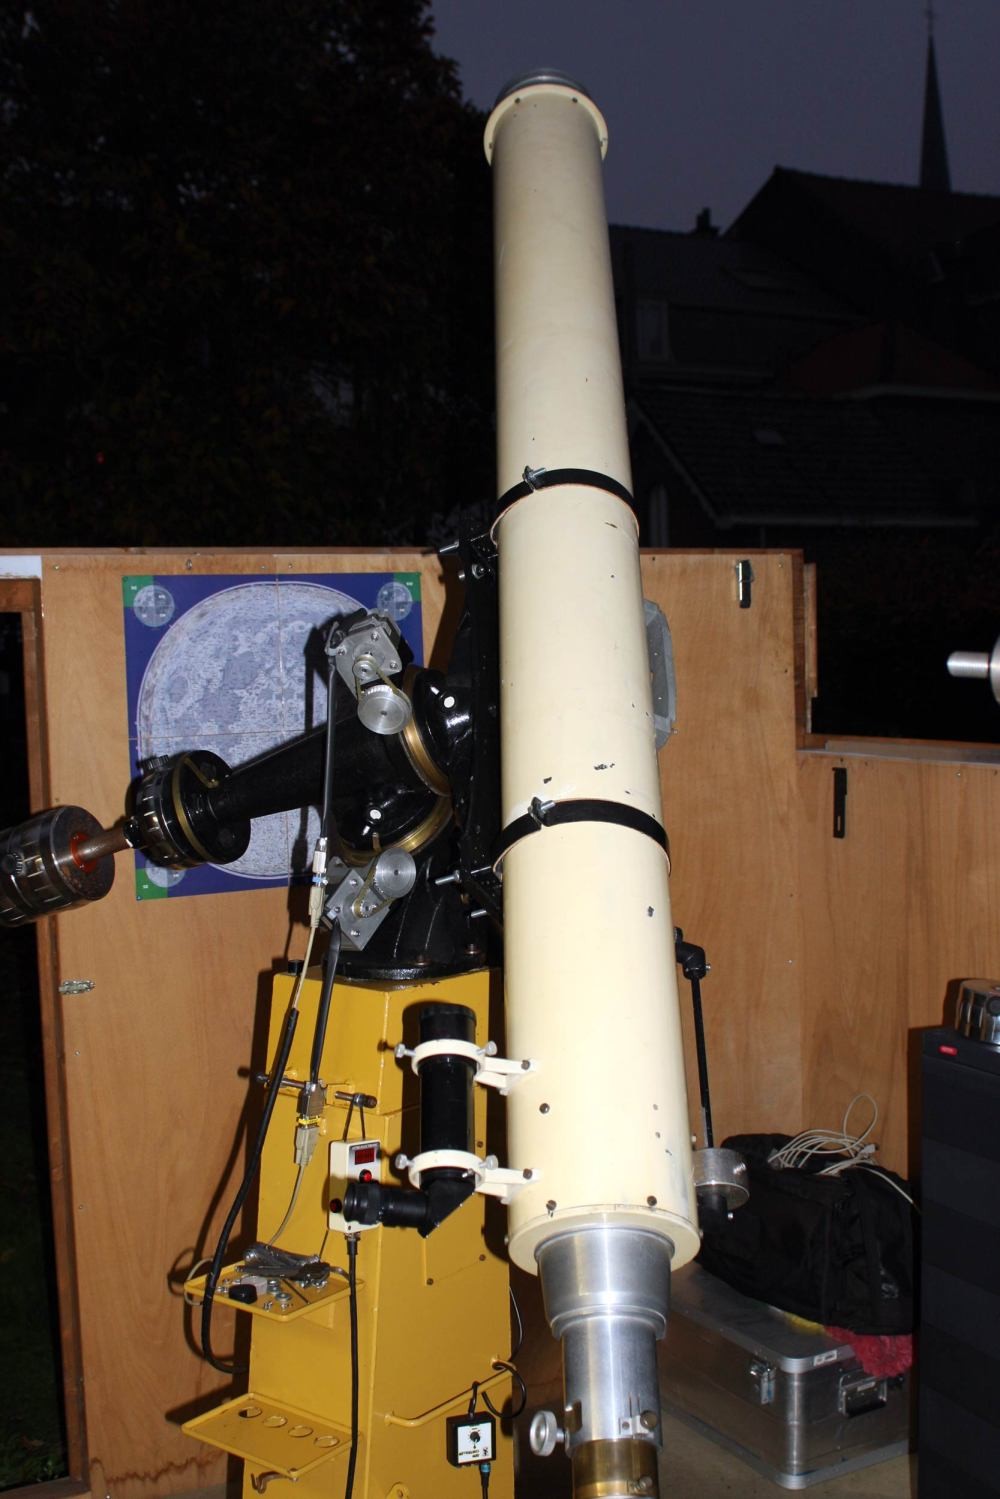
The image shows Dave Trott standing beside his folded Unitron [on the far right] and his own, superb, folded 6" f15 refractor. Even with the dewshield in place it is obvious how much shorter both these instruments are compared with the incredibly long, classical, straight tubed originals.

With a 6" f/15 refractor: Focal length = 90" or 8'6" [2.25meters] plus dewshield length. Dave Trott has built a couple of folded refractors. He has obtained valuable "hands on" experience which he has shared online: Dave Trott is also responsible for lots of interesting YouTube videos mostly on classical or 'vintage' telescopes. The image is "borrowed" from Dave Trott's website and is reproduced here for educational purposes. Hopefully his fine example will inspire others to investigate and build their own folded refractors.

 
Constructing a Folded Refractor - DaveTrott.com

https://www.youtube.com/channel/Dave Trott/videos

Websites illustrating folded refractors:

Multiple examples [German language] : Faltrefraktoren.pdf
Use a website translation service if necessary.

An open 'spar' design: Teleskope - VR VR 150/3000

TMB 9" f/9 Triplet APO Folded Refractor - IceInSpace

It is interesting that Peter Wise uses the folded refractor design for his f/12 8" "Zerochromat." This is a form of Dialyte telescope utilizing a singlet, long focus objective lens. It's claim to being close to an apochromat is achieved with two folding mirrors and smaller correction lenses placed in front of the focuser.  It's cost is quite competitive compared with similar sized, commercial, achromatic refractor OTAs [with far more false colour] and very much cheaper than true Apochromats of the same aperture. It is also much lighter with fewer objective cooling problems in comparison with a true APO triplet. Allowing it to be mounted on the larger Skywatcher equatorials of relatively modest price.

REFRACTING TELESCOPES FROM ZEROCHROMAT - HOME
 
Click on any image for an enlargement.
*

29.12.15

7" f/12 iStar folded refractor 2: More Optical Folding.


Here I have superimposed the folded light path on an image of Dave Trott's 6" f/15 compact refractor. This design utilizes the smallest possible main tube diameter relative to aperture. 

There could be difficulties with shielding [or baffling] from stray external light with such close coincidence of the folded light beams at the second folding [flat] mirror. A slightly wider spacing of the parallel sections of the light beam will provide easier baffling at the expense of a larger round tube. Mr Trott suggests his more compact design fits into a 10" diameter, round tube, instead of a 12" one, had he used 'standard' parallel folding. The larger tube would have been heavier, much more bulky and more difficult to "manhandle" when off the mounting.

An alternative would have been to use an oval OTA. The main tube really needs to be no wider than that necessary for the objective's cell and/or counter-cell. Plus room for a thin baffle to avoid grazing incidence causing reflections inside the main tube. The downside is an inability to rotate [or even mount] the oval tube in standard mounting rings. Though rotation is rarely required for a refractor since a star diagonal can be simply rotated in the focuser. An oval tube does present some peculiar mounting issues compared with round tube rings. A dovetail on the bottom of the oval probably makes most sense. With the objective nearest the dovetail to avoid flexure of the oval's flat sides due to the overhanging mass. Plywood boxes are commonly used for folded refractors of all designs. Its stiffness and ease of use is handy for building prototypes which can be rebuilt in metal, if desired, once any bugs are ironed out. Metal tends to be less forgiving of later design changes.

Numerous folded refractor designs have been tried over a very long period. Some use smaller tubes joined to the larger main tube at an angle to carry the last "leg" of the light cone to the focuser. Others have used an open truss arrangement. Or even had an exposed, first folding flat, mounted on the far end of a simple spar. A protective sleeve or sock can be slipped over these arrangements to preclude stray light. It must be remembered that the design must hold the focuser, folding mirrors and objective in a fixed relationship to each other. Flexibility and sagging of any of the multiple component must be carefully avoided. Otherwise collimation problems could easily arise along with loss of aperture and astigmatism. If nothing else it could lead to the eyepiece being off axis to the center of the focal plane and no longer perpendicular to the objective. Regular recollimation is time-wasting if required before and even during an observing session. 

Folded paper light cone with the second flat further away from  objective. This requires a larger second flat and remote adjustment of the flat's collimation. [Or an access door in the side of the OTA] This arrangement uses 5" and 4" flats conservatively with plenty of allowance by using them over-sized. The objective is 180mm or 7" diameter @ f/12 and the circle of illumination at the focal plane is now set at 20mm for visual use. This is the arrangement for the very compact design used by Mr Trott.

It is sometimes asked why folding flat mirrors have to be more accurate than [say] Newtonian elliptical diagonals. The reason is quite simple. A 45 degree diagonal magnifies any surface error [from flat] by 1.4. Whereas a folding flat mirror returning the light cone by almost 180 degrees effectively doubles the effect of any surface error on the flat mirror. The much greater distance from the focal plane further exaggerates any surface zonal errors on the flat by optical leverage. It obviously pays to invest in the best possible first folding flat mirror from a recognized and respected source. 1/20th wave accuracy is listed by several US manufacturers.

Objective lens quality varies enormously but ought to be at least 1/10th wave in monochromatic light for a high quality, astronomical telescope lens. Using [only] a typical 1/10th optical flat will effectively halve the quality of your objective lens to only 1/5th correction. This strongly suggests that a guaranteed 1/20th wave first folding flat is chosen. However, it is extremely unfortunate that this first, flat mirror must be so large in so many folded refractor designs. This places a far greater demand on the optical accuracy during manufacture as well as enormously increasing the price.

It should be noted that I am referring to zonal errors here rather than curvature. A perfect optical flat is essentially a mirror of infinite radius of curvature. Flats in the real world will have very long radii of curvature but probably not infinite. Weak curvature should have very little effect on a folded optical system because the mirrors are not [usually] tilted by very many degrees from perpendicular. All that very mild curvature would do is lengthen or shorten the effective focal length slightly.

A slightly different parallel folding arrangement with the second flat mirror cell mounted on the back of the objective support plate. This also uses a 5" diameter 1st optical flat but needs only a 3" diameter for the second folding flat mirror. My original paper light cone was made for a much larger 50mm illuminated circle at the focal plane intended for SLR photography. Today I cut the paper cone again but to a 20mm final circle of illumination. Had I done this earlier I could have chosen to use a smaller second mirror. Albeit one requiring careful placement to avoid vignetting or using the full diameter of the mirror. Which might have impacted on the edge quality. The height of this folded optical layout is greater. Demanding a larger, round OTA or an oval tube.  For a real telescope design the likelihood of using a star diagonal requires that the focus falls well beyond the back plate. This will require a larger, second folding mirror. Which is where the generously over-sized 4" second flat size wins. Allowing far greater design flexibility than with a very tightly constrained, 3"optical flat.  

 There is some doubt as to the claimed accuracy of 1/30th wave commercial flats. This is because it is so difficult to measure even with vastly expensive Zygo interferometers. The huge jumps in price as diameter and accuracy increase recognizes the difficulty of reliable manufacture to such a high standard. Even the substrate, mirror [blank] material, can vary in stiffness, annealing quality and thermal stability. Most flats are polished in bulk while fixed to a supporting medium or tool. Simply removing the polished flats from this medium, after polishing, can produce unwanted curvature as the blanks are released. The quality of annealing and resulting stresses within the mirror blank itself must be carefully considered. Surface polish quality is also dependent on the substrate material. With fused quartz competing with Zerodur, Pyrex and even plate and crown glass each has their own properties and claims. Not least for the amateur telescope builder is their usually, very high cost!

A more realistic folding of the light cone with allowance for the focuser length and star diagonal. The objective lens may be moved forwards if the 1st flat size proves too small. The simple, tapered piece of paper provides immediate insight into the required size of the optical flats and where the folds will not exceed their preferred diameter. The paper will also give instant confirmation of where and what size any baffles may be placed along the optical axis.

 
Click on any image for an enlargement.
*

25.12.15

British Pathé films: Telescopes and astronomy.

*


While trawling YouTube for astronomical videos I came across a whole range of historical films from British Pathé. From pre-WW2 to later decades, they range over a great many historical instruments and users in action. Including amateurs like HP Wilkins the famous Moon mapper shown with his 18" back garden telescope and unbelievably detailed map drawings. Or George Hole, the famous, British large telescope builder who made instruments which dwarfed many of today's Dobsonians. Note the attention to function rather than finish. With sawn finished, painted planks clearly visible. These chaps were working in ordinary back gardens overlooked by housing estates.

It is well worth viewing many of these films if one can cope with the distinctive and extremely dated "propagandist" voice-overs. Turning down the sound will usually work wonders and remove some of the inaccuracies. "Lens" is frequently interchanged with "mirror" in reflecting telescopes, for example. Which may be, and probably is, extremely pedantic on my part but typical of journalistic license and ignorance.


From Hurstmonceux to The Vatican to large US telescopes these wonderful instruments are usually shown in actual use. A far cry from anything the BBC ever put together to pad out the gaps between their vital [and usually overrunning] sports coverage and domestic politics drones.

The films are not yet well organized for content. So that even searching for (british + pathé + astronomy + telescopes=) produces a lot of irrelevant "hits". Though it is well worth being patient to unearth some really fascinating gems. I keep wondering whether the dress code was always formal even when the cameras were not actually rolling?

*

7" f/12 iStar folded refractor 1: Optical folding.

*
A new contact has raised the specter of folding my 7" f/12 iStar refractor. I had been seriously considering a folded refractor before becoming involved with other telescope projects. The finished 7" OTA is still well over 7' long and much heavier than I had hoped. The weight could be reduced at the considerable expense of rebuilding the whole thing or paying for a carbon fiber tube.

The commercial dome to house my "straight" refractor is right at the limit of those commercially available at remotely affordable prices. [Pulsar UK] Beyond that point the price of observatories rises rapidly. The dome has to be imported  from the USA or Australia at vast expense. Not to mention the massive addition of import taxation to every part of the purchase price plus freight. Then the crane hire making the purchase of such a beast as unlikely as my ever owning a Ferrari.

I want [and now have] my dream 7" classical refractor but I want [need] it to be light enough for a septuagenarian to lift onto the mount. Or [much better] have it permanently mounted ready for use under a shelter from the wind and showers. Anything which gets between ease of use and the sky is a reason not to go out under changing cloud or weather conditions. When it is both cold and windy one can wrap up well but watering eyes in a gale, as the telescope moves to every gust, is just another hurdle to enjoyment of the night sky.

I can still have my refractor but I can make it much more compact. [At considerably greater expense!] The weight might not change much but it would be enormously easier to protect the instrument and myself. Both from the wind and the weather under quite a modest dome. Domes are unique in allowing almost instant observation at a whim, without requiring any set-up time.  So how can I have my 7" cake and eat it? By folding the light path with flat mirrors.  

An entire family of folded refractors all in one place! Such a level of productivity suggests considerable skill at ATM. I believe this image was taken from an original print sent to me several decades ago. Tragically I can no longer remember the details nor the owner/builder of all these instruments.

Folding a refractor involves employing at least one, or more usually two, flat mirrors to bend the objective's light cone back on itself. The idea being to reduce the moment arm of the typically, very long, straight refractor tube to produce a [hopefully] more compact form of telescope.  One not subject to catching the wind nor requiring extensive storage. Not to mention a suitably hefty [and therefore very expensive] commercial mounting. The downside is that it usually leaves a desirably shorter but much fatter OTA. Which may not appeal to the purist who prefers the long, straight tube soaring high into the air. [And the wind!]

If only life were simple there would be far more folded refractors than straight ones. The main problem is the considerable expense of the flat, folding mirrors. Suitably precise optically flat mirrors are not remotely cheap unless sourced secondhand with a very large element of luck. Secondhand purchases hold obvious risks in ensuring the required precision even if the source is known. The first and largest mirror ought to be at least 1/20th wave accuracy according to most informed sources. Anything less accurate will undermine the optical quality of the objective lens. Surface curvature on the folding mirrors will introduce astigmatism. This is due to the tilting required to return the light beam clear of the objective lens. 

A single reflection back in the direction of the objective has rather limited usefulness. The observer would have to turn their back on the object being studied. Though a star diagonal might be introduced if the light beam was brought out near to the side of the tube. However, the observer's body heat would be right beside or [worse] right under the objective in normal use. Probably leading to severe thermal problems due to body heat crossing the incoming light path. What you might call the "Herschellian" form. Which the great astronomer and telescope maker pioneered with his reflecting telescopes. He was trying to avoid having to use a [constantly tarnishing] speculum metal, secondary mirror. He turned his back on the sky and looked straight down at the primary mirror through the eyepiece.

One other alternative is to employ a single, rather large, elliptical flat to push the converging light cone out through the declination bearing. Or altitude bearing in the case of an altazimuth mounting. The equatorial design might force very awkward eyepiece positions while the altazimuth would make the EP horizontal. The latter might sound better but would need to be high enough for comfort [while sitting?] and would cover a large circle of ground with changes in azimuth. A heavy counterweight would also be required to balance the heavy objective in the absence of the usual bottom half of the normal straight tube. It could be made to work but has some severe limitations in larger apertures and longer focal lengths.

Two mirror, folded designs, have a greater number of useful options. The simplest bounces the light beam back from the first mirror to a smaller, second one beside the objective.  Thence back to to the focuser plate at the "bottom" of a much shortened tube. This design was used by Unitron for their 3" folded refractor but is best used with larger apertures and longer focal lengths. The cost of the two, precision, flat mirrors must be added to the price of the objective lens. Though the flat mirrors can make for a far more compact design than a long, straight tube. It also places the observer well away from the light beam and may feel more natural as it follows conventional refractor practice. 

The mounting requirements shrink to match the new tube length and could even be considered as providing the necessary savings to pay for the folding flats. [Optically flat mirrors are commonly known as 'flats' or 'optical flats.'] For most users a further reflection will be required from a star diagonal to avoid the usual neck wringing. The loss of light at the necessary mirror reflections can be much reduced by using enhanced aluminum or dielectric coatings.

The imaginative builder could come up with an "X" shaped light path to bring the focus out at a far more comfortable viewing angle. The downside being the increased depth required for a very long focus design. I drew an 8" f/18 design for a D&G lens available at that time. This seemed to leave a large hole in the middle where the altitude bearings should normally be on a Dobsonian design. It would have been quite bulky too. Though the straight tube version would have been all but impossible to mount at reasonable expense. 8" x f/18 = 144" or over 12' long without its dewshield! Still suitable for a quite a small dome but only in the folded form.

The "X" or "Figure of 4" form belongs to the "Newtonian" style of folded refractors. Where the eyepiece exits the side of the tube somewhere near the top of the tube. This design could also be employed to throw the light cone out through the altitude or declination axis. It makes much better sense than trying to do this with only a single mirror reflection because the folded light cone is already much reduced in length. A Dobsonian mounted design, similar to a Newtonian reflector in appearance, could provide comfortable viewing with an eyepiece which remains almost static. The observer is still close to the light beam but no more than with a typical Newtonian reflector. A dewshield will provide further thermal shielding. 

A single, round, first mirror at the bottom of the tube does the major folding. While an elliptical [Newtonian] secondary mirror can manage the [near] right angle turn. This places the focal plane where it can be examined with an eyepiece in a normal focuser on the side of the tube. With suitable design the eyepiece movement could be reduced to a minimal arc around or even through the Dobsonian altitude bearing itself.

A greater degree of folding would be achieved by bending the light beam across the main tube to use up even more of the [usually] long focal length. Though this requires a larger secondary mirror than the shorter route at necessarily, greater expense. The opinion seems to be that 1/10th wave is good enough for the second [45 degree] reflection. Though higher accuracy does remove all doubt as to its effect on performance.
Baffling the intended folded design, to avoid stray light, is vital to retaining the refractor's highly desirable, image contrast. Seemingly simple, folded designs can easily make it impossible to avoid incoming light flooding the field of view. Complex tubular baffles may easily add internal or external reflections. Or actually block the folded light beam unless great care is taken in the design. Just because the refractor is folded does not mean that the builder can relax their standards on baffling and the use of low reflection lining or painting matt black internally. 

I strongly recommend that the potential folded refractor builder draw and cut out a full sized light cone to try various folding ideas. This is highly preferable before committing to great optical expense and materials through over-optimism. It will also give the builder a true sense of scale of the likely finished instrument. Manhandling the long, wedge-shaped piece of paper is a great educator and will quickly indicate whether the "white elephant" is really worth pursuing.

These two images are example photos taken of a full sized folded paper light cone. I have deliberately crossed the light beam to obtain a different layout to the usual parallel folding arrangement. The optical flat sizes can be measured directly off the paper or marked for easy reference and different folds made [and remade] to examine many potential layouts.

The lower image shows how the focuser can be brought right back to the tail end of the OTA. Given sufficient tilt this will avoid using a star diagonal for observing objects at modest altitudes around 45 degrees. For objects at or near the zenith a star diagonal will provide a comfortable downward, sloping view into the eyepiece much like using a microscope. This angle reduces the incidence of floaters in elderly eyes.

If the OTA is fitted onto an altazimuth mounting then a star diagonal can provide a horizontal eyepiece which moves only over a rather small arc while the observer remains comfortably seated. A 5" first folding flat will be situated about 36" from the objective. A 6" flat is a rather close 21" from the objective and of limited benefit for a two mirror, folded system. A 4" flat will be situated 58" inches from the objective. I have been generous in over-sizing these flats to avoid potential edge problems. A rolled edge from polishing may be the limiting factor on an otherwise excellent flat. Simply by avoiding using the edge of the flat mirror one can [sometimes] enjoy a much higher quality level of accuracy at the same cost as the lower quality. This improvement in quality is not guaranteed!  

It is so much quicker to fold and refold a long, wedge-shaped piece of lining paper than to draw and redraw to scale on much smaller sheets of paper. The size and position of potential folding flat mirror sizes can be checked in moments and the realistic size of the OTA either admired or discarded as completely impractical. Strangely folded refactors can be mounted in deep plywood boxes. Or suitable tubes mitered and welded together at the correct angles.

Weight should always be kept in mind even with a compact folded refractor. While the more compact folded designs are almost certainly smaller than a straight tube original the addition of the flats and their mounting cells can easily add to the overall weight.The main advantage is that a compact, folded refractor is highly unlikely to need a tall mounting. So stretching high overhead with a heavy OTA should be completely unnecessary. Consideration should preferably be given to a seated position to maximize ease of use and comfort in observing. This holds true whether the instrument is mounted on an altazimuth or equatorially.

The optical folding mirrors should always be over-sized to avoid any chance of a rolled edge spoiling the performance. Nor allow undersized mirror to reduce the effective aperture when tilted. The mirrors need not even be round except for greater ease of mounting. Elliptical [Newtonian secondary] mirrors are far more readily available than round and could be substituted for round ones provided they were of sufficient accuracy.
 
 
Click on any image for an enlargement.
*

24.12.15

24th December 2015: Jupiter beckons again.

*
Jupiter was glowing brightly to the south again as I rose at 6.30 am. By the time I was fully set up it was nearly 7.00 and Jupiter was still only about 32-33 degrees high according to Stellarium. The planet was moving along just above the roof ridge seen from my usual flat observing spot. So I decided to drag the entire pier and telescope down the drive to bring Jupiter into clear sky.

The optical effect, if any, was not dramatic, but I was now in direct line with the wind being channeled past the house. Observing with one's eye watering and the telescope shaking was not an improvement over my more sheltered area north of the house. Yet again there was a strong thermal overlay on the Jovian belts with them disappearing completely at times. From long experience I know I usually need at least 40 degrees altitude for a decent view of the planets almost regardless of the seeing conditions.

I persevered and pushed the power up to 175x with the Baader Fringe Killer in place. Though the filter had little benefit and only seemed to dim and yellow the image. I rotated through various eyepieces to see which might be best but there was little to choose between them. The point of best focus was soft and best judged as lying somewhere between a magenta or a green fringe around the planet. A far cry from recent lunar views where the focus is much tighter. Two dark Jovian belts kept teasing with increased detail but it was never resolved.

I still haven't got around to making a 150mm, 6" mask for the 7" iStar R35 objective. 84/6" x 1.35 = f/19. It would be interesting to see if stopping down the 7" would actually improve the view. There would be some loss of aperture but the colour correction would be further improved from the present f/16.2. The CA ratio changes from 2.3 to 3.15 which moves a 6" f/12 R35 well into Sidgwick's well corrected range. When focusing with the full 180mm aperture the image goes quite free of false colour and devoid of fringing at best focus.

As previously discussed, I need more mounting stability in the wind and much less weight to carry or drag about. The OTA is very hard work to carry out from storage and then lift up into the open rings in stages. Moving the entire instrument always means traveling slightly uphill and the sheer weight is very noticeable despite the pneumatic tyres. It may be that the whole instrument is rocking on the flexible tyre walls during wind gusts. I suppose the wheels could be duplicated for lower rolling resistance on soft ground and less flexing in the wind. Solid "puncture proof" tyres are available but from long experience I know they they will only sink deeper. Despite decades of compaction the graveled area I have to work from is never really firm and becomes worse in winter and after rain. Any plans to move to a better site, with a clear southern view, have never materialized. 

*

22.12.15

7" f/12 iStar refractor 30: The 180mm goes altaz?

*
I have just realised that the Orion[UK] Dobsonian mountings use their own "rolled" rings to support the altitude bearings. I have two of these rings to nicely fit the 8" diameter of my 7" refractor OTA. These rings are remarkably light [1lb each] compared with the plywood-packed, traditional "Skywatcher" type rings @ 2lbs each. Which means that I can have the trunnions permanently fitted to the OTA without adding much weight to carry out to the waiting altazimuth fork. Since an altazimuth mounting does not tip sideways it needs no closed rings to avoid the OTA falling off.

Now I need to design some altitude bearings to fit onto the Orion rings which weigh as little as possible. A minimum diameter of 8" seems reasonable for the trunnions. Increasing the diameter applies just enough extra friction to avoid tube balancing problems. The trunnion bearing pads can always be moved apart to increase friction if necessary. My 5" refractor used 6" PVC rings against PTFE/Teflon pads but only because that was the size of tube I could most easily obtain. Some builders add "Formica" to the edge of plywood arcs to form the bearings. I have yet to come across any form of laminate in DIY outlets in Denmark. Perhaps I just haven't been looking hard enough?

There is a well-boring company not too far away. They always have a large skip full of potential PVC pipe off-cuts with which to make altitude bearings. I must try to avoid the usual massive disks of plywood which are traditionally used to support the bearing surfaces. In 3/4", or even thicker, birch plywood can add considerable weight even in 8" diameter. Yet the support for the stubs of tube, which form the actual bearing surfaces, want to be stiff enough not to distort or flex. Particularly when the telescope is moved over a small angle to bring an object back into the field of view.

It is here that the [usually] buttery smooth, low friction movement works so well on a Dobsonian telescope mounting. One wants just the right amount of dynamic friction compared with static friction. So that the telescope does not drift freely nor have so much friction that it causes judders as the bearing "un-sticks" in small steps. There are favourite laminate materials which have been proven to have the perfect bearing materials in combination for this very purpose. Some builders swear by waxed bearings to achieve the perfect level of friction. In comparison with ball or roller journal bearings the Dobsonian bearing can provide the perfect telescope movement. Even allowing very high powers to be used to follow an object effortlessly.

My earliest 5" refractor mounting, built decades ago, moved with a pull of only 1lb in all directions up, down and sideways until it reached the zenith. Only here did friction rise above the normal. It felt absolutely magical in use despite the simplicity and low cost compared with building a mounting with bearings. In fact it took years before John Dobson's ideas were universally accepted. They could not bring themselves to take the giant leap of faith away from their expensive, precision mountings and costly [commercial] OTAs.

Building a suitable offset fork is not just a matter of adding thick lumps of plywood to a suitably thick plywood base. The base joints want to be reinforced with webs or box sections to avoid splaying [or swaying] of the fork sides when the telescope is being moved. There is noting worse than having mechanical backlash when only a tiny angle change in pointing angle is wanted. The frustration of not being able to perfectly center an object with the slightest nudge or pressure is best left to the equatorial. Though one could apply slow motions to a Dobsonian they really should not be necessary in a good mounting design.

Nor should the azimuth bearing in the base be made too small. An undersized base will tend to tip too easily simply through having too small a footprint for unconditional stability. The smaller the footprint the larger the angle forced on the base through the slightest sinking into soft ground. If that tipping coincides with telescope movements then the valuable stability of the Dobsonian design is lost.

For the same reason one should use four feet instead of the theoretically perfect three. The base will always flex, or sink, just enough, to provide vastly greater stability than having only 3 feet. Only a rigid 3-legged stool on a hard, uneven floor will enjoy greater stability over a normal 4-legged one. Piers ought to have four legs rather than three for the same reason.

The radius to the tipping line, drawn between any two feet of  3- legged support [of exactly the same length of side as a 4-legged object] is always much smaller. See the image above where all sides are the same length. It takes little imagination to see how a top heavy object can fall outside its center of gravity with a 3-legged pier. While any lopsidedness remains stable with a 4-legged device. There is almost always enough flexure to ensure all 4 feet feel the same pressure to resist toppling on anything but a perfectly hard surface. Climbing onto a 3-legged stool to reach a high shelf is not recommended! A quadricycle is far more stable than a tricycle during cornering. Which is why there are so many cars with the normal quota of four wheels and so very few three wheelers.

*

21.12.15

21st December 2015 Suckered again.Twice in one day!

*
A glance out of the bedroom window as I rose at at 7am showed three planets to my south. I went straight outside and set up the 7" refractor on the pier only for it to cloud completely over in seconds. I never saw them again and packed up after half an hour of pointless staring at the underside of fast moving clouds as it grew slowly lighter. It was hovering around 9C, 48F so it was unusually mild for a late Danish December at 55N. The down jacket I had put on in anticipation of a chilly breeze was completely superfluous. I was soon sweating as I maneuvered the pier back to its resting place.

Then on the evening of the same day the slightly gibbous Moon was rising in the west. I dragged the pier out again from its parking place just in time for another complete overcast. Not even the slightest glow from the west!

As I had been struggling to push the big and heavy refractor up through the open tube rings one of the plywood packing segments fell out! Though this did not represent a serious danger to the telescope I immediately decided to use some small screws and nuts to fix the plywood to the rings. I also relieved the plywood packing where it was gripping the tube rather too tightly. Handy for security against the tube sliding back down while the rings were still wide open. Except that it made it all but impossible to push the telescope any higher once it was sitting in the open rings. I just hope it isn't too loose for the scary moment between placing the OTA in the rings and climbing onto a crate to tighten the lower clamping screw. The upper tube ring thumbscrew is strictly a third or fourth rung stepladder reach. An observatory or permanent, removable cover would be highly desirable to maximize my viewing time instead of wasting it on preparation and tidying everything away again.

Half an hour later I had finished my "repairs" but the Moon was still not showing its face and it had started raining! At least I shan't be troubled by loose packing rings on any of my extremely limited chances to view the sky between the endless clouds. It seems to have been completely overcast, or heavily clouded over, for literally months now. On the positive side we have hardly used any fuel in our stove so far this "winter." Each month that passes is setting yet another record for warmth.

______________________________________________

Next morning, it was still a very mild 44F, 7C, at 7am when I saw the sky was clear again. Having struggled to get the heavy OTA into the rings I found the tube seam was in the wrong place to allow the rings to close properly. Despite yesterday's relief work the upper ring was till gripping the tube far too tightly even when it was wide open. Disaster nearly followed as the polar axis started to rotate as I struggled to push the OTA higher and twist the whole thing into position. Working in the dark it was impossible [at first] to see the catch on the Orion stop ring was jammed against the lower tube ring!  

By the time I was set up for viewing Jupiter it had maxed out at only 30 degrees local altitude. Initial impressions were absolutely awful! The Jovian moons were shapeless and bloated with Jupiter a fuzzy, almost featureless, colourful  ball with no distinct edge. Quite why there should be any thermal effects I have no idea. The OTA's storage and outside temperatures usually match quite closely. Just as they did this morning. There wasn't a whole degree difference out or in.

Fortunately things improved quite quickly and I was able to see two distinct rings as the moons shrank steadily. The scene was one of rapid thermal agitation with only the briefest of glimpses when the contrast improved. Last night's gales had decreased but there was about a half second undulation to the view each time the wind picked up. Not enough to throw Jupiter out of the field of view nor too difficult to follow with the eye it soon damped down again.

Before long the sky turned a uniform milky white as the brightest stars rapidly disappeared from view. A very low Venus clung on the longest as only Jupiter remained visible above the house roof. There was no longer any point in moving the whole instrument to get a view clear of the roof. The strong wind was probably dragging away any convection effects from the roof  itself. I finally packed up at 8am with Jupiter now invisible having had only brief hints of potential detail in the rings. I pushed the power up to 175x but kept rotating different eyepieces through the focuser to see which would work best in the difficult seeing.

I am beginning to realise that I have overbuilt the OTA for easy carrying out to the MkIV mounting. Then having to lift it bodily into the open rings so high above the ground. The sheer size of the instrument is best suited to a fixed observatory situation. The most obvious alternative now is to make an offset Dobsonian bearing fork to carry the OTA. Freed of the considerable weight of the MkIV mounting and the heavy counterweights the pier will be much easier to move about on its pneumatic wheels.

Lowering the 7" refractor OTA into open fork trunnions will be much easier than manhandling it [at exactly the correct height and orientation] into the raised equatorial mounting rings. The sliding tube balancing weight is very handy on a finely balanced equatorial but should be unnecessary on an altazimuth. It adds yet more weight to be carried and lifted without easy provision for removal.

There will be no difficulty in bolting the base of a Berry-style, counter-weighted, offset fork to the welded flange on top of the pier. If I raise the trunnions on a taller fork it will help to compensate for the loss of height which the MkIV mounting presently provides. Viewing Jupiter at 30 degrees, with a star diagonal in place, the eyepiece was at precisely the most comfortable height while standing. This is with the present, nose-heavy balance position. A more evenly balanced OTA would provide a comfortable eyepiece height at much higher [and more useful] elevations. Re-balancing the OTA could be easily achieved with a [tool free] removable weight at the eyepiece end of the tube. Being removable it need not be carried with the OTA but applied only after the tube is safely mounted.

I shall have to scrounge some 8" PVC pipe off-cuts for the trunnion bearings and start building a fork. I feel 6" pipe will be too small to provide sufficient friction against the PTFE/Teflon pads for such a long OTA.


*

19.12.15

Fullerscopes 3" Export refractor on eBay[UK]

*
Fullerscopes 3" Black / Brass Export Refractor and MKIII mount | eBay

Fullerscopes Export 3" achromatic refractor with brass finder and Mk3 mount with slow motion worm gears, good optics and mount. 1.25" draw tube. Being a refractor you will need a right angle eyepiece holder to use it. (not supplied)

Asking for bids over £180 after being re-listed following a lack of bids at £200.


In fair condition cosmetically it looks as if the brass has been re-polished. This might need to be re-lacquered to avoid too regular a repetition with the Brasso. Brass from the classical period should be finished in deep gold and is readily available in cold working lacquer from clock restoration outlets. There is no longer any need to develop the necessary skill to apply layers of lacquer to hot metal. Though the modern coating may not be to the same high standard nor last as long with regular handling.

The original, black wrinkle paint looks most attractive. We must remember that a 3" refractor was a serious instrument in its time, albeit the smallest recommended by authors like Patrick Moore. It is only recently that refractor prices have fallen with [mostly] Chinese mass production. Leading to a wide range of choices at previously unheard of apertures.

Note the classical one-sided, internal, rack focuser and knurled, brass, focusing wheel. It is very fortunate that the instrument uses 1.25" eyepieces. Earlier instruments would have used RAS thread. Which is obsolete these days if modern eyepiece quality is desired. An original instrument would have used Huygenian or Ramsden eyepieces.  Which are fine for a long focus refractor but have rather a small field by modern standards. Modern star diagonals are very affordable and only necessary for observing objects at higher altitudes.

The brass finder has centering rings with excellent standoff to avoid interference with the main eyepiece when the finder is being used.

The instrument would look well as an exhibition piece in an indoor setting. Yet light enough to be carried out to the lawn to enjoy viewing the Moon or even the Sun by solar projection. Though these days a full aperture solar film filter is considered much safer. Particularly if there are children in the household. A telescope should never be left unattended if there is the slightest risk of children pointing it at the Sun.

The whole instrument could easily be mistaken for a high quality Victorian or Edwardian refractor from the golden era of "Brass and Glass" from the workshops of one of the great London makers. Fullerscopes took over Broadhurst & Clarkson but this was long after the heyday of the "name" in optics. No doubt Dudley Fuller hoped some of the "label" quality would rub off on potential customers.

Even cursory examination of my Fullerscopes mountings suggests the contrary as far as quality was concerned. The MkIII being sold with the refractor is a sturdy but very basic mounting by modern standards. This one has the advantage of slow motions and original axis locking wheels. It will carry a 3" refractor quite effortlessly if suitable wooden tripod legs are fitted to the base casting. A synchronous motor could possibly be obtained from Beacon Hill Telescopes to keep objects in the field of view. GOTO will cost a great deal more unless you have the skill to adapt it from a modern mounting.

Click on any image for an enlargement.

*

19.11.15

Very silly video showing Fullerscopes 6" refractor on MkIV.

*


Starring Wanda Ventham, Stephanie Beacham and Ed Bishop from the 1970s 'UFO' TV series.

*

13.11.15

7" f/12 iStar refractor 29:Remote control rods.

*
Adding the declination control rod was free and easy. I just borrowed a flexible stalk from the dirt cheap, 70mm Bresser refractor which I bought from Lidls. See image alongside of declination control rod in place. I have also added the Orion[UK] rolled tube ring to ensure the OTA is mounted at the correct balance point without fiddling about. The clever suggestion to fit pan-head screws as stops or balance position indicators would have meant removing the baffles, finder, backplate, focuser, three handles, the counterbalance weight rail, etc.

This would have further damaged the matt black paint and involved a lot of fiddling with small nuts and screws deep inside the telescope tube. Then, of course, it would all have needed refitting. I chose adding the tube ring as a flexible means of setting the balance point. My telescopes tend never to be completely finished as I think of new ways of doing things after hand-on experience.

Fitting the polar drive control was another matter altogether. As previously stated, the screwed rod on the PA casting faced the wrong way. i.e. It pointed away from the mounting. Fine for a Newtonian reflector on a low pier where the control knob would be within easy reach. Not so on a long refractor. Undeterred I set about drilling the opposite side of the casting for a 1/4 BSW thread. I even managed to get the hole well aligned and the correct size for the tap by starting the hole at the rim.

Unfortunately, I had chosen to buy a brand new [crap] tap online from the UK. It was marked Dormer [in black crayon] and "British made" but was obviously just another rip-off from China. As soon as any resistance was felt the tap just snapped off inside the hole. There was no spring at all and I was only using a tapping chuck on a small T-handle.

They say a bad workman blames his tools: I have been cutting threads for very nearly half a century. I don't break quality taps. I was taught how to do it properly as a teenager in an engineering workshop. I have tapped threads in every imaginable material and size. Even including several in "soft as cheese" Fullerscopes aluminium castings. My secondhand collection of taps has lasted for decades with careful use.

So now I have a [crap] tap broken off inside the 50 year-old Fullerscopes casting precisely where the new, screwed rod should sit. Fortunately I can continue to use the original drive engagement rod but that's hardly the point. I'd need to reverse the direction of the screwed rod to reach the eyepiece with an extended control rod. Assuming I used gears the tightening direction would be reversed too. A very long flexible stalk could be used by it would like crap and probably have a load of backlash. What is most irritating is that the RA drive is the one I use all the time. The reversible declination drive hardly at all.

This image shows my attempt to duplicate flexible control cables but offering longer life and hopefully, greater flexibility and resistance to torsion loading.  The black, SW type [from a Bresser 70mm refractor mounting] have already split along the moulded seams.

These white, translucent tubes are quite stiff and came from disused gardener's spray bottles, I think. Stuffing a linear-reinforced, bicycle, index-gear cable down its throat produces exactly what I am looking for in a flexible cable of the correct size to match existing end fittings. The attached knob is an original from the Fullerscopes MkIV. Though black tubing would be "prettier" the resulting cable is far superior to the £20 commercial item. Which stiffens with the cold and often takes on a permanent bend. I could slip some black hose over the top of the white stuff for an even better looking flexible cable.

Bathroom and kitchen tap "tails" use a form of small diameter stiff plastic hose, but it is rarely seen in loose coils, unlike the larger stuff. Usually the 6mm, 1/4" has unwanted [expensive] fittings already swaged on. Snipping these off would still be cheaper than buying spare SW cable extensions at inflated astro accessory prices. Stiff, hydraulic, or pneumatic hose would probably be available in black or other colours. I only want these cable extensions to act as universal joints for my remote control drive rods. They need to tolerate some torque for locking the axes via the worms. The bicycle cable outers provide extra stiffness and resist hose collapse under fitting screw pressure and bending.

I finally got around to making a lens cap for the refractor to allow it to rest safely on its dewshield. Two circles of 18mm plywood, glued together, will help to spread the loads when lifting the OTA up onto its stumpy dewshield. It was a nice fit and worked fine. Making the OTA very stable when upright thanks to the counter-cell improvements. I still tied a loop of cord through one of the handles and over the nearest rafter to ensure it doesn't topple in any Danish earthquakes.

The Moon has been well placed for the last couple of evenings but thick cloud has spoiled any chance of a viewing.  I am pottering on with the OTA and Fullerscopes mounting in the hope of a change in the endlessly grey weather.

An early rise had the Moon to the south west so I dragged everything out and set up. It was immediately obvious that there were thermal issues. The Moon's surface looked soft focus and in constant agitation with "boiling" on the limb. It would not support more than 100x in the 7" refractor but I persevered for an hour before giving up as the sky rapidly blued. Venus in the South was no higher than the Moon and showed a terminator just beyond half. I tried the "Fringe Killer" filter to reduce the glare but was surprised by the heavy yellowing and dimming. I really need a closed box to fix to the southern side of the pier to house the eyepiece case. Having the case lying out in the open just invites dew. I shan't keep the eyepieces in the unheated shed either as they rapidly dew over in use. Rotating them through my jacket pockets between use helped but was not an ideal solution.

Click on any image for an enlargement.
*

12.11.15

A 160cm f/15 refractor on a Fullerscopes MkIV.

 *

A superbly restored MkIV with stepper motors and Goto carrying a 40kg restored refractor obtained from an abandoned observatory in Czechoslovakia in Eastern Europe.

http://debeerst.ning.com/profiles/blogs/observation-report-first-light-160mm-gajdusek-kozelsky-refractor-

The pier is now too low by a considerable margin.  I wonder whether the roll-off roof will clear a much taller mounting?

Fullerscopes MkIV improvements?

*
I dismantled the MkIV mounting to be able to work more easily on replacing the bent and rusty, drive control rods. The Dec shaft came out easily enough but the Polar Axis shaft was firmly stuck. When I finally removed it I found that it had not been inserted deeply enough into the Dec casting. My own fault for not marking it prior to insertion when I changed the rust-prone shafts to [featureless] stainless steel.

After carefully measuring the depth of the hole and marking the shaft I used a block of wood and a lump hammer to drive the shaft fully home. I re-cut the holding screw threads with a 5/16BSW tap after spotting through the screw holes with a center punch. Then I drilled a shallow pit for each pointed screw on opposite sides of each shaft for the fixing bolts to get a good grip on the shaft. I don't think there is any danger of a shaft falling out now. The image above shows the nylon plug which presses against the rim inside the annular section of the wormwheel. The thin sheet of PTFE/Teflon is to reduce friction. One of the shaft fixing screws is visible jutting from the casting just above the new, slanting, stainless steel, threaded, drive control rod.

My only 5/16BSW tap had a very long taper. This proved unable to reach deep enough with a fully formed thread with the 1.25" shaft still in place. So now I had to undo yesterday's hammering to get the shaft out again! I decided to bring my biggest vice into play. The shaft was inserted into a thin-wall steel tube for protection from the vice jaws. I could now use the lump hammer against a large stump of timber with an angle cut on one end. The wood had to hit the flat face of the casting squarely without damage from the hammering. The angled end ensured the maximum area was being struck to avoid damage without hitting the shaft. Fortunately the mark I had made on the shaft reversed steadily away from the casting face and I was eventually able to remove the shaft without damage.

Now I could cut the locking screw thread to full depth and check [repeatedly] that the pointed screw just broke into the bore in the casting without looseness. The casting alloy is very soft and there was no point in making the thread any deeper than necessary. The shaft was then hammered back in using another block of wood to avoid damaging the end. The upshot of all this work is that I now have two opposing screws to fix the polar shaft very safely in place without any offset force from only one fixing screw.

My next discovery was that the Declination wormwheel had been badly machined at the time of manufacture. The hub of the 7" spoked, bronze casting seemed never to have been turned to the correct height. Not only was it 1mm higher than the rim but the face of the boss was visibly sloping!! An oversight which has gone unnoticed for probably 50 years. The real clue was in the raised hump in the center of the PTFE, low friction disk. The vital rim bearing showed no rubbing at all on the white plastic disk. While the polar disk showed even wear to both center and rim rubbing surfaces.  Measurement with vernier calipers showed the center boss was fully, 1mm higher than the rim. Which meant that the declination axis had never enjoyed the plate bearing support provided for in the brilliant initial design.

The first cut, with the 180mm, 7" 359 tooth wormwheel in the 4-jaw chuck of the lathe, immediately confirmed the sloping surface of the hub. [See image] It took several cuts just to get a clean surface all over the boss. Only then could I measure the relative levels of the bearing rim and the center boss. Once I had some idea of the amount of material to be removed I set the speed up considerably to avoid chatter marks. finally I gave a cut across the back of the wormwheel to take out an obvious warp!

I am supposing that, ideally. the boss and rim should be level on both sides of the wormwheel. This would provide the best bearing effect of low friction from the smaller diameter boss. While still retaining the stability of the much larger, but more lightly loaded, rim thrust surface.

The rim thrust bearing can be thought of as similar to a Dobsonian ground board and rocker box. The large circle formed by the bearing tab's radius ensures adequate friction with great stability against tipping. A complete lack of friction is usually undesirable in a telescope mounting. It demands perfect balance in all planes and is easily affected by the slightest breeze or touch. A low, but unchanging, degree of friction makes handling the telescope much more pleasant and relaxed. The clever Dobson mounting used suitable materials to achieve this without needing precision machined surfaces or absolute rigidity. Allowing a gentle nudge to track an object. Or providing the necessary resistance to allow focusing or changing eyepieces without instantly losing the object.

The flat faces of the MkIV's castings add their own stiffness to the axis shafts. An idea attributed to Russel W Porter in his Springfield [plate and pin] mounting but also used on much earlier mountings. The flat bearing faces greatly resist bending loads applied to the shafts. To maximize this effect the rims of the plates must bear at least some of the load.

The mechanical disadvantage applied to the rims is at a much larger diameter than the bearings on the shaft. Separating the bearing faces, at an angle, is rather like trying to lift something heavy by pushing down on the short end of a long lever. This makes it very difficult for the flat faces to separate against the applied weight of the telescope, heavy mounting parts and the counterweights.

The MkIV always had a reputation for being able to support far heavier instruments than might be imagined from its quite modestly sized 1.25" shafts. The increased strength can only have come from the flat/plate bearing faces. Fullerscopes introduced a very thin PTFE sheet between the load bearing faces to reduce friction over the large area involved. The thin sheet provided no additional flexibility. So the [highly desirable] intimate fit between the flat bearing faces was maintained.

Adding slow motion wormwheels might have undone the MkIV designer's genius in applying plate and shaft bearings in combination. However, the designer ensured the greatest diameter carried the major loads by introducing a hidden, internal, thrust rim. This protected rubbing surface could not be easily contaminated. The thin, PTFE sheet was now placed between the wormwheels and the flat face to maintain low friction. In an un-driven MkIV the PTFE sheet would go between the flat, aluminium casting faces.

The wormwheels are essentially fixed [by their driving worms] when the telescope is slewed. So the moving friction face is now between the wormwheel rim and the flat bearing face. NOT between the underside of the wormwheel and the next plate bearing face. The underside of the wormwheel surface only ever moves at the incredibly slow equatorial or declination drive rate. As can be easily seen by the complete lack of wear to the lacquer I applied to the back of the declination slow motion wormwheel. I rarely used the reversible, motor driven, declination slow motion for visual use so no wear has taken place over the years. Conversely the arrowed rear rim does show wear on the RA wormwheel in the image below. One can safely assume that the rim bearings are working as intended on the polar axis.

There are no "naked" shaft overhangs anywhere in the MkIV's clever design. Many mountings have long lengths of exposed shaft which must inevitably put all the bending loads onto the shaft itself with considerable leverage. The worst possible situation is between the north bearing of the Polar Axis and the declination 'T' casting. Or between the mounting saddle and its nearest bearing.  

The MkIV also has bronze shell bearings pressed into the castings. These provide direct connection to the stiffness of the castings without the unwanted freedom introduced by journal bearings.

The MkIV's axis castings are conical. With the bearings carrying the highest loads centered in the large round flat faces which act as strengthening flanges.  The loads are carried into the casting over a very large area further reducing the chance of flexure. The much lighter loaded ends of the castings are much reduced in diameter because they do not need to be otherwise.

One means by which the MkIV could be improved further would be stepped or [better] tapered shafts. With a larger bearing at the "fat" end of the castings where most of the loads are concentrated. However, this modification requires a number of changes. The saddle and declination 'T' castings would need to be bored oversize to maximize use of the increased shaft stiffness. Though these bores could remain at 1.25" with a larger diameter sleeve fixed over the original shaft. The fit of the sleeve would have to be perfect and firmly fixed to have any value. Industrial adhesive would probably do the job if the sleeve would not be hydraulically pressed over the shaft. The shoulder of the step in the shaft must butt up tightly against the casting which that shaft supports. Otherwise the increased shaft stiffness is lost at the precise point where the greatest loads are applied.

The introduction of journal bearings might actually undo some of the MkIV's best qualities. Ball or roller bearings would probably only be necessary at the fat ends of the castings. The smaller ends carry much lighter loads and would not benefit from lower friction bearings. Adding taper roller, or other linear load bearings might actually undo all the advantages of the plate bearings! It would require very fine adjustment of any linear bearings to avoid undermining the plate bearing's added stiffness. Friction might be usefully reduced but must not be at the expense of stability provided by the large bearing surface areas.

The one, major Achilles Heel of the MkIV is the polar altitude adjustment. The conical polar casting is pivoted in the forked base casting. Two "ears" carry bolts which are threaded into the polar casting. The altitude pivot, obviously, cannot pass right through the polar shaft. So two short pivot bolts are the only way to carry the entire weight of the mounting, counterweights and telescope into the base and pier.

The original pivot holes on my MkIV were horribly off center by well over 1/2". These holes must have been drilled without any reference or jig. Meaning that the conical polar casting was badly skewed between the supporting fork once the bolts were fitted.

Considerable work, with a large, coarse, round file eventually "moved" both holes over to the correct position. The now very badly over-sized holes needed to be drilled to size and then re-threaded in a larger size. The problem now was the complete lack of coarse threaded, altitude pivot bolts available in Denmark. So I used a larger metric tap and stainless steel bolts but the thread was too fine for a serious grip in the soft casting material. I tried packing inside the ears but that just reduced desirable clamping friction. In the end I needed a turn buckle just to maintain the correct polar altitude. The silly little, altitude locking screws have no grip whatsoever!

The polar casting is hollow so a bolt might be dropped through the bearing hole and then maneuvered sideways through the altitude pivot hole. A nut could then be used on the outside of the ears/fork tines to apply as much pressure as needed or desired. The problem is the difficulty of getting a large bolt to turn inside the casting to get it to pass through the fork tine from the inside. No spanner would fit through the sleeve bearing so an extended hex socket key would be necessary. It just seems far too crude a method of overcoming the MkIV's weakness in this area. A hex socket head bolt does have the advantage of a relatively small head if I should decide to follow this route. Though the very small diameter head would put large local loads on the casting.

Making a new, forked base out of seriously thick aluminium, or even steel, does not overcome the need for these two, short bolts to carry the entire mounting and telescope. Drilling large offset holes beside the originals, to aid placement of bolts from inside the casting, seems rather unkind to such an old and venerable mounting. One might as well build a whole new polar housing as well. If the polar housing was made square in cross section it could have a removable top plate to allow internal access for fitting large, polar altitude, pivot bolts. The MkIV's appearance would be changed drastically. So why stop there? One might as well start all over again building a new mounting from scratch!


Click on any image for an enlargement.
*

11.11.15

7" f/12 iStar refractor 28: Ridged observatory alternative to a dome?

*

A ridged, bell ended observatory at a UK public [fee paying] school housing an antique 4" or 5" refractor. This design has the advantage of not needing spherical gores. Though room for the refractor dewshield is more limited [than a dome] up at the peak. Suggesting that it be made slightly taller to compensate.

Unlike a spherical dome, it does not shout; "observatory alert" to the casual observer. Particularly if not furnished with a snow white "hat" like many domes. It could easily pass for a common garden shed to any passer-by. Though the roofing felt does reinforce its [apparently] lowly status.

The ability to rotate is hidden by the form, generous overhang and traditional construction. The base need not be made multi-sided if a cylinder is desired. Cylinders might draw slightly more attention but it could still pass for a grain silo in this agricultural, rural situation. Or, the structure could be somewhere to enjoy afternoon tea in the garden but sheltered from the changeable weather. Octagonal "garden summer houses" are popular in Denmark but usually glazed.

The observing slit is formed by two, long, flat panels. Hopefully with interlocking channels at the joint and hinges to shed rain. The entire "roof" structure rotates like a dome but would ideally need something better than the traditional roofing felt seen here. Otherwise there would be thermal problems as it absorbed the sun's heat and released it later. Not to mention felt's great weight compared with aluminium or even a fiberglass construction. Aluminium panels would need traditional folded seams to look well and remain strong and weatherproof. Wrinkling could be avoided due to the flatness of the panels and [hopefully] some manual expertise.

Skilled, metal roofing workers still exist in Denmark [and elsewhere no doubt] and are known as blikkenslager here. Tin smiths or even tin beaters are usually employed for making metal roof flashing, decorative roof ornaments and dormers. I wonder how much it would cost to employ a tradesman to construct a strong and weather proof shell of this form out of aluminium? It would almost certainly be cheaper than any commercial dome in the 12' size. A skeleton of square or rectangular, aluminium tube would greatly reduce the weight and extend the lifetime compared with the traditional, deep plywood ribs. Not to mention the tubing's smaller section providing rather more space inside.

The image shows a similar observatory erected in New Zealand to house a Cooke 5" refractor.

   Edward George Leonard Morley — 1894 to 1973 Nelson Astronomer | NZETC

A thin, plywood, shell construction is still possible but would be much heavier than aluminium with more thermal issues. The ridged, bell ended observatory is certainly an interesting option. Not least from a historical perspective for housing a "classical" refractor.

Click on any image for an enlargement.
*

9.11.15

7" f/12 iStar refractor 27: Ringing the changes.

*

I woke early this morning and had my first and only sighting [so far] of the three planets perfectly lined up in the Eastern sky. Brilliant Venus low down, then dim Mars and brighter Jupiter were arranged in ascending order of altitude. I tried my 8x42 binoculars but could see little more detail than with the naked eye. A quick 'snap' with my Lumix T27 proved worthless. I captured only Venus and the dimmer Jupiter with Mars unseen.

The Moon was just visible, very low down, through the deciduous hedges thanks to a winter thinning aided by a storm. With the sky lightening rapidly clumps of cloud were further spoiling the contrast. The Pleiades were just visible over the trees to the west with Orion already sinking out of view. I couldn't use the telescope while the 7" is still dismantled as I consider how best to stiffen the counter-cell arrangement.

The 1/4 BSW stainless steel studding arrived in the post today along with the matching 1/4 BSW tap. As did the 202mm rolled rings from Orion[UK.] The finish is difficult to see in the images but has a lightly "hammered" texture.

I had no idea these rings have no "proper" base. It is inevitable that a tangent will lie across the ring's circumference with a small gap each side. [Arrowed in the image] Small screws are supplied to fix each ring, through the rolled band to a mounting dovetail [or saddle] via pre-drilled holes. Some dovetail bars do have a radius on their upper surface and would help to support the ring more evenly at the fixing point.

A considerable length of thread can be taken up by the fitted plastic [?] knob on the clamping screw. I was initially afraid the rings were slightly too large until I allowed the thread to pass right through the knob by a very small amount. There was some resistance from the knob when I tried this but it was free to turn on its thread immediately afterwards. The rings were then nicely snug on the main tube with the folded, main tube seam lying neatly under the gap where the hinges are fitted.

I don't think I'd be happy simply screwing these tube rings straight onto a flat surface. The entire tube would want to rock from side to side with nothing to stop it doing so except for the highly stressed fixing screws. A simple alternative would be to add suitable supports as packing under each ring fixing. The tube ring would then be stopped from any lateral rocking by the packing pieces. Round rod, with the fixing screwed passed through perpendicularly drilled holes would have a stabilizing effect. It might be best to fill the gap between the tangent and the curve until the base of the curve between the screws and their packing strips or rods just touches the flat mounting surface in the middle.

I ordered these rings weeks ago when no other [budget/affordable] ring option in the correct size seemed available anywhere. Why on earth a commercial, cast  8" [200mm] ring is not part of the standard range seems very strange.

Orion listed the 202mm size as if it were standard stock but apparently they are made to measure. I have since obtained a couple of pairs of well-oversized 235mm diameter "Skywatcher" type tube rings. One pair was packed out with 30mm wide birch plywood rings precision cut to size with my router and DIY circle cutting jig. Otherwise I would have had no rings to hang my new refractor project on the MkIV mounting.

I am left wondering whether the Orion rings are actually an improvement on the massive looking "standard" rings with their thick plywood packing. The packing does make the cast rings look the part. As the sort of typically over-engineered castings one might find on a classical refractor. Particularly when they have been painted all over in one colour to make them appear as solid items. Their "massive" appearance is very much a matter of taste. There is absolutely no "give" at all once the clamping screw is tightened on these rings. Even when opened these rings fit so well that sliding the OTA through them to obtain the correct balance is very hard work.

The Orion rings do seem very likely to suffer from local flexure at the fixing points if stressed perpendicular to the telescope tube. Unless, of course, they are seated on suitably thick strips or rods. Otherwise, the wind, or just pushing the focuser sideways to nudge the image back on center would tend to make the tube rock from side to side on the dovetail or saddle. That said, Orion do seem to use these rings on a large range of their own telescopes.

In the images here I have fitted the Orion rings on the tube to see how they look and feel compared with the [plywood] modified "Skywatcher" design. The Orion rings would be too low to hold a carrying handle because there would be no finger clearance between the handle and the main tube unless suitable packing pieces are added. I shall have to ponder on how best to use these rings.

They are certainly very lightweight compared with the [heavily packed] "standard" ring design. One Orion ring could be used as a stop ring so that the OTA cannot slide down through the main rings. As such it would not add much weight to the OTA for carrying out to the mounting. These rings might also be used for supporting a guide scope or larger finder. However, such additions all add to the OTA's overall weight.

I remain convinced that having the tube rings previously fitted on the MkIV's saddle is the best way to mount the heavy OTA. A dovetail bar would only add to the weight since the bar and the rings would already be fitted to the main tube. There is a nice sense of security as the OTA is lifted to the vertical and lowered into the open lower ring. The saddle has already been set and locked pointing at the pole star. The OTA is then tipped up at the focuser end to lower it gently into the upper ring. The fit is now so good that the OTA shows no tendency to slide downwards. I just need to fit a stop of some kind to ensure the OTA is balanced before I climb the ladder to tighten the top ring, clamping screw. The lower ring is just reachable from the ground provided the pier has not been jacked up too far.

Well over a foot [30cm] increase in height is available from the lowest jack setting to the highest. The trailer jockey wheels continue to allow fairly easy movement around the area of activity. It has to be dragged slightly uphill from its normal parking space. But rolls readily back down again after working on the telescope or its mounting. It is not a matter of wheel friction or resistance but overcoming the inertial mass when first getting it moving uphill.

This image shows a third ring being glued to the front of the previous two. The small flange on the main tube is now trapped between the front and second ring. With a relief shoulder routed out to make just enough room for the flange. The difference in internal diameter between the 20cm [8"] main tube and the 195mm of the objective cell is too small to allow the counter-cell to be sunken within the main tube. Keeping the  main tube flange will help to maintain the roundness of the main tube thereby avoiding distortion and sag. The 5mm collimation "pull" screws are being used for exact location of the front ring. The ring also slips nicely onto the flange thanks to careful routing. Thus maintaining the maximum cross section of plywood.

Once the glue was dry, the 36mm thick, birch plywood rings make a solid counter-cell for the objective. The rear section of the objective cell enters the front of the plywood ring to achieve a reasonable seal and some extra support. The three, long 'pull' screws pass right through the objective cell, the stumpy dewshield and then the plywood counter-cell rings where they are tightened into the trimmed T-nuts. The stumpy dewshield is trapped flat against the front of the counter-cell and provides a solid surface against which the collimation 'push' screws press. The push screws are furnished with stainless steel Nyloc nuts to spread the load rather than indenting the stumpy dewshield. The full length dewshield now slides over the stumpy one rather than being a permanent feature. This allows the refractor to be rested vertically on the shorter dewshield with colliding with the ceiling.  A sturdy refractor should maintain collimation in the long term despite being repeatedly moved between mounting and storage. An f/12 isn't particularly sensitive to optical misalignment but accuracy of collimation is still highly desirable.

Click on any image for an enlargement.
*

7.11.15

7" f/12 iStar refractor 26: Bin there. Done that.

*

Repeated breakdown of affordable tarpaulins drove me to try something else to cover the MkIV mounting on its even taller pier. A 300 liter rectangular water butt! 55x75x95cm [22x30x38"] in green plastic. Fits like a glove, rather difficult to lift that high and looks completely daft, but protects the drive motors and their wiring. Whether it will prevent birds roosting is quite another matter. This thing is huge when it is on the ground but looks tiny when covering the mounting.

The polar axis has never been cut short since I replaced the rust-prone, original 1.25" [31.8mm] steel shafts with stainless steel. I had vague ideas for mounting larger wormwheels or even thrust bearings down there but nothing came to fruition. The projecting PA shaft pushes the water butt enough to stop the edge dropping neatly over the counterweights on the far corner. Turning the tub on the diagonal helped a little at the expense of looking rather casual, untidy and haphazard. Removing the tube rings and tatty tarpaulin would help. I have made the tube rings easily detachable in the past using wing-nuts for fasteners. Though I haven't quite reached that point with the new rings yet. The extra labour required before mounting the OTA and difficulty of reach makes it less desirable now. I will just have to try the water butt without tube rings on the mounting. Though it is likely to place even more demand on cutting off the over-long PA shaft.

Pictures tomorrow if it ever gets light again. Today was yet another, dark grey day but with added rain. Talking of water I just thought of black plastic, flexible pond liner material as a longer lasting cover. Too late! The CIA is bound to have satellite pictures of my inverted [water] butt by now. Any claims that I now have the worlds smallest [lift-off] observatory are unlikely to hold water. With a storm coming tonight I hope the tub won't catch the wind enough make the pier tip over! I have lowered the wheel jacks as much as possible. It is possible that the untidy tarpaulin would have acted as a sail but the weight of the pier seemed enough to keep it stable.

I decided to remove the rainwater tub during the storm and also removed the objective from the OTA to take it indoors. The tub proved to be a water collector even when inverted. I narrowly missed a soaking as the base and rim rapidly emptied as I tipped the tub over while lifting it off the mounting.

Another image with the tube rings removed allowing a much lower, protective cover. The tube ring bolts can be fitted with wingnuts for rapid, tools-free fixing to the saddle.

Another thought has occurred to me regarding the objective counter-cell. The present plywood rings are are prevented from being pulled off the main tube by the narrow, main tube, pressed flange. It follows that I could make another ring which fits in front of this flange. This will help to stiffen the counter-cell arrangement.

The short dewshield flexes slightly due to its dual purpose in offering resistance for the collimation push screws. There is a small gap between the flange and the plywood rings on the main tube due to the thickness of the pressed steel flange. This narrow gap offers the potential for air currents and insect ingress. The gap also denies the rather thin dewshield flange any support from the plywood rings which accept the collimation, pull screws.

Image of the MkIV mounting showing [in orange] how locking/drive control rods might use standard flexible, slow motion stalks to allow control extensions right back at the focuser. The red arrow shows how the PA locking stud and its Bakelite knob face the "wrong way" to allow a flexible stalk to connect to a control rod. It will require a new hole be drilled and tapped for a new control stud at 180 degrees to the original. In practice I shall drill the other side of the PA casting to avoid any conflict with the present stud. The tapped hole is strangely skewed which will require considerable care to achieve the correct angle. It will probably be easier to drill from the rim which supports the wormwheel. To ensure the active, plastic plug is sited against the inside surface of the annular wormwheel rim.

There is a fair seal from the main tube flange pressing against the back of the dewshield. A new plywood ring would provide solid resistance to the collimation screws pressing the plywood rings together. The ring's rear face would have to be relieved slightly to accept the main tube flange. It could then be glued to the other plywood rings over the main tube flange to close the gap. The inner diameter of this ring should match the rear, tubular section of the objective cell. With just enough freedom to allow the cell to be collimated. So the fit doesn't want to be too tight. The collimation screws push the cell away from the dewshield flange allowing airflow around the cell. This may not be a good thing unless the cylindrical rear section of the objective cell is better sealed into a "proper" counter-cell. It was not until I studied my rather odd counter-cell design [using a flange on the back of the dewshield] that I realised I had left the rear of the objective cell open.  Fortunately the dewshield flange is a close fit on the rear extension of the objective cell.


Click on any image for an enlargement.
*